Friday, 12 September 2014

Salesforce-to-Salesforce (S2S) Integration

              S2S allows you to share data between Force.com organizations.The data exchange takes place entirely within the servers that run the Force.com platform.It can be valuable for business-to-business scenarios such as partner relationship management and customer support, providing a point-and-click solution for information sharing that can be set up and managed without additional technology products and their associated costs and complexity.

salesforce to salesforce

Establishing a Connection:
         To start, you need at least two separate Force.com organizations.You already have one, so sign up for a second Developer Edition account.Then, enable the S2S feature in both organizations.
1. App Setup area and clicking Customize--> Salesforce to Salesforce-->Settings. Click the Enable check box and then the Save button.

salesforce to salesforce integration

2. S2S establishes connections between organizations using ordinary email.The process begins with one organization initiating the connection. Initiation requires a Contact record containing the email address of the person who is authorized to accept the connection on behalf of his organization. Users without Modify All Data permission cannot initiate and accept S2S connections unless an administrator has enabled the Manage Connections permission on their profiles.
3. Create a new Contact record in your first Force.com organization with the email address of the administrator of your second Force.com organization.
Note: Connections tab is only visible if you have enabled S2S in your organization.
4. Goto the all tabs then select Connections tab then create a new contact record. 

Connections tab

5. Select the Contact and click the Save & Send Invite button to send the invitation email.

New_invitation

6. Then another organization(sfdc gurukul) get email like this, 


Click on the link, Then it will asks Login details of your's.Enter login details then it will asks Accept  or Decline.

s2s_conformation

  7. Click on Accept, to Connection Activated message will appear.
Connection_Activated

Now Configuring of connection is done.

Configuring Shared Objects:
          An object is shared between two organizations when one has published it and another has subscribed to it. Publishing and subscribing are configured per object.All custom objects are supported, but not all standard objects.
1. On the connection detail page, click the Publish/Unpublish button to edit the list of the objects that are published to the connection.
 Publishing_objects

 2. Select objects to publish. To share a record, you must forward it to a connection using the External Sharing related list. After a record is shared, updates are sent automatically.

Published_objects

3. Publishing is also configured at the field level. Initially only the standard Name field is published.To add more fields, click the Edit link beside the published object.

s2s_Published_objects

4. Then select the fields  check boxes, then select save.

published_Fields

5. You’ve finished publishing the object and its fields, but records cannot be forwarded until the other organization closes the loop by subscribing to the objects. Subscribing involves mapping the published object, fields, and values so that the published records have a place to call home in the subscribing organization.
6. Log in to the second organization and visit the Connections tab.Then click on Subscribe/Unsubscribe button.
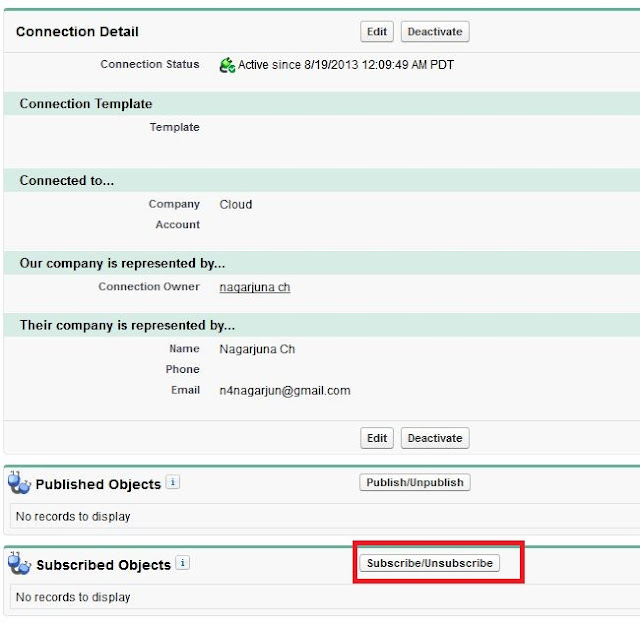
Objects_mapping

7. Each object published by the first organization is listed on the leftmost column, with a drop-down list of objects in the second organization that can be mapped to the published data.The auto-accept option streamlines the data sharing process, instructing Force.com to accept every record of the selected object forwarded by the first organization. By default, acceptance is a manual process of logging in and clicking a button.You cannot auto-accept records in child objects in Master-Detail relationships, because they cannot be accepted or rejected independently of their parent records.

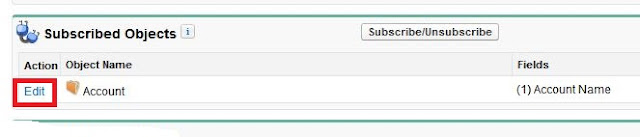
Add_or_Remove_Subscribed_Objects

8. Like publishing, subscribing takes place at the field level. Click the Edit link beside the subscribed object to edit the field mappings.

Subscribed_objects

9. The left column contains the fields from the published object; the right, column drop-down lists of fields from the subscribed object. Select a field from the subscribed object to map it or click the Automatically map fields check box to map identical field names from the published object to the subscribed object.

Edit_Subscribed_Fields
10. Now you’re ready to share records.

Sharing Records:
          To share records between the organizations, the organization publishing the object forwards one or more records of that object.The subscribing organization accepts the records, which creates them in the subscribed object, mapping their fields and picklist values as configured in the Connections tab. Records are forwarded using the External Sharing related list.This special S2S related list is not visible on page layouts until manually added by an administrator.
1. Editing the page layout of the Account object to drag the External Sharing related list from the Related Lists palette at the top of the screen to the region at the bottom of the screen.


2. Click on Account object and open the record scroll to the External Sharing related list. Click the Forward This Account button.

Forward_this_account


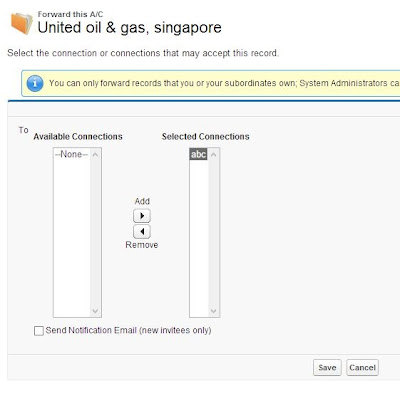
Here you can pick one or more S2S connections to share records.

Forward_accounts
3. After forwarding the record, examine the External Sharing related list for the current status. If the subscribing organization has enabled auto-acceptance of records for this object, the status immediately indicates that the record is active. If not, the record is not active until the subscribing organization manually accepts it.

Sharing

 4. Then go to the other organization click on account tab to find Accounts from Connections section.

Accounts_from_Connections

5. Click on go button.you can view the received records,then click on accept to get it.

received_records


6. Now go to Account object to view the records.

            You have successfully caused a record to travel between two Force.com organizations. If the second organization modifies the shared record, the changes do not propagate back to the first organization. Furthermore, if the first organization modifies the record, the corresponding record in the second organization is updated to match, overwriting any updates made by the second organization. Deleting the record in either organization simply breaks the connection rather than cascading the deletion to the other organization. Sharing of the record can be stopped at any time by a click of the Stop Sharing link in the External Sharing related list.
             Although S2S maps records in a lookup relationship as strings rather than full related objects, it does provide some special functionality for Master-Detail relationships. All child records are automatically forwarded initially, when the parent record is forwarded. Updates of those original child records are also forwarded, but not additions and deletions. 

Wednesday, 10 September 2014

XML Parsing Using DOM Parser in Apex.

Use the XmlNode class to work with a node in an XML document. The DOM represents an XML document as a hierarchy of nodes. Some nodes may be branch nodes and have child nodes, while others are leaf nodes with no children.
Node Types
There are different types of DOM nodes available in Apex. XmlNodeType is an enum of these different types. The values are:
COMMENT
ELEMENT
TEXT
It is important to distinguish between elements and nodes in an XML document. The following is a simple XML example:
<name>
    <firstName>Murali</firstName>
    <lastName>Mohan</lastName>
</name>
This example contains three XML elements: name, firstName, and lastName. It contains five nodes: the three name, firstName, and lastName element nodes, as well as two text nodes—Murali and Mohan. Note that the text within an element node is considered to be a separate text node.

Example to Parse the xml data or file Dynamically

VF Page :


<apex:page controller="Xmlparsercls" sidebar="false">

    <apex:form >
        <apex:pageBlock >
            <apex:pageBlockButtons location="bottom">
                <apex:commandButton value="Parse Xml" action="{!Parsexml}"/>    
                <apex:commandButton value="ParseXML File" action="{!Parsexmlfile}"/>
            </apex:pageBlockButtons>
            <apex:inputTextArea value="{!xmlstring}" style="width:336px;height:260px;"/> &nbsp;&nbsp;
            <apex:inputTextArea value="{!outxmlstring}" style="width:336px;height:260px;" id="response"/><br/>

            <apex:outputLabel value="Select Xml File" for="file"/>
            <apex:inputFile fileName="{!fileName}" value="{!body}"/>
        </apex:pageBlock>
    </apex:form>
</apex:page>


Controller :

public  class Xmlparsercls {
    public String xmlstring{get;set;}
    public String outxmlstring{get;set;}
    public String filename{get;set;}
    public blob body{get;set;}
    public Xmlparsercls(){
    }

//Parsing xml what you entered in the left text area
    public pagereference Parsexml(){
       outxmlstring ='';
       DOM.Document xmlDOC = new DOM.Document(); 
       xmlDOC.load(xmlstring); 
       DOM.XMLNode rootElement = xmlDOC.getRootElement();
       String result= walkThrough(rootElement);
       return null;
    }
  
  //This is for parsing xml file what you selected
  public pagereference Parsexmlfile(){
       outxmlstring ='';
       DOM.Document xmlDOC = new DOM.Document(); 
       xmlstring=body.tostring();
       system.debug('****xmlstring'+xmlstring);
       xmlDOC.load(xmlstring); 
       DOM.XMLNode rootElement = xmlDOC.getRootElement();
       String result= walkThrough(rootElement);
       return null;
    }
    
   Public String walkThrough(DOM.XMLNode node) {
        String result = '\n';
        if (node.getNodeType() == DOM.XMLNodeType.COMMENT) {
            return 'Comment (' +  node.getText() + ')';
        }
        if (node.getNodeType() == DOM.XMLNodeType.TEXT) {
            return 'Text (' + node.getText() + ')';
        }
        if (node.getNodeType() == DOM.XMLNodeType.ELEMENT) {
            
            if (node.getText().trim() != '') {
                outxmlstring += node.getName()+'=' +node.getText().trim()+'\n';
                String nName = node.getName();
            /*    if(nName == 'XXX')
                  {
                             String xxx = node.getText().trim();
                   }    */
            }
            if (node.getAttributeCount() > 0) { 
                for (Integer i = 0; i< node.getAttributeCount(); i++ ) {
                    result += ', attribute #' + i + ':' + node.getAttributeKeyAt(i) + '=' + node.getAttributeValue(node.getAttributeKeyAt(i), node.getAttributeKeyNsAt(i));
                }  
            }
            for (Dom.XMLNode child: node.getChildElements()) {
                result += walkThrough(child);
            }
            return result;
        }
        return '';
    }
}

OUTPUT :


When you are selecting file then click on ParseXML file button.
When you type as shown above in the textarea then click on "Parse Xml" button then you can parse the xml.

Thursday, 4 September 2014

How Salesforce Determines Record Access for a User?

This is the pictorial representation of how Salesforce determines record access for a user
How Salesforce Determines Record Access for a User
  1. When a user needs to access a record, Salesforce will first check whether the user’s profile has required permission to access the object. If user’s profile does not have the required permission, user will not be able to access the record. If the profile has required permissions, system will proceed to step 2
  2. System checks “View All Data” system permission. If granted, user will be able to access the record
  3. Else, system will determine if the user is the owner of record. If yes, the user will be able to access the record
  4. Else, system will check Organization Wide Default (OWD) setting for that object. If OWD is set to Public Read Only or Public Read/Write, user will be able to access the record
  5. Else, system will check if the user is above in the role hierarchy from the owner who owns that record. If yes, user will be able to access the record
  6. Else, sharing rules are checked. If the user has been granted access to the record through Apex sharing, sharing rules or manual sharing, user will be able to access the record
  7. If none of the above requirements are met, user will not be able to access the record

Thursday, 28 August 2014

Creating Progress Bar field using Formula| Without any coding

In this post we will discuss on creating Progress bar field without any coding, just by using formula field. Initially it seems like we can’t create dynamic progress bar field by using only formula in Salesforce. There are some approach, where developers stores 4 images with interval of 25% or 10 images with 10% interval and displaying image with help of Case or IF statement.
We will create Progress bar field, which will reflect every percentage.
Progress Bar using Formula field in Salesforce
To create perfect Progress bar field, we will need to take help of two images.
  1. Empty filled image with border (Download Sample)
  2. Filled rectangular image (Download Sample)
Upload above two images in Static resource. Once it is uploaded create a formula field.
In Formula field we will be appending both images and repeating “Filled Image” as per percentage field. Logic can be seen in below image.
Logic for Progress Bar using Formula field in Salesforce
Formula for Progress Bar Image
1IMAGE('/resource/1398170360000/BlueProgressBar''Test'10, ( percField__c * 100 )) &
2IMAGE('/resource/1398170333000/ProgressBorder''Test'10, (100 - percField__c * 100 )) &
3' ' &
4TEXT (percField__c * 100) &
5'%'

Wednesday, 13 August 2014

Batch Apex in Salesforce

To use batch Apex, you must write an Apex class that implements the Salesforce-provided interfaceDatabase.Batchable, and then invoke the class programmatically.

To monitor or stop the execution of the batch Apex job, go to Setup --> Monitoring --> Apex Jobs. For more information, see “Monitoring the Apex Job Queue” in the Salesforce online help.

The Database.Batchable interface contains three methods that must be implemented:
 start method
global (Database.QueryLocator | Iterable<sObject>) start(Database.BatchableContext bc) {}
The start method is called at the beginning of a batch Apex job. Use the start method to collect the records or objects to be passed to the interface method execute. This method returns either a Database.QueryLocator object or an iterable that contains the records or objects being passed into the job.
execute method:
global void execute(Database.BatchableContext BC, list<P>){}
The execute method is called for each batch of records passed to the method. Use this method to do all required processing for each chunk of data.

This method takes the following:
o             A reference to the Database.BatchableContext object.
o             A list of sObjects, such as List<sObject>, or a list of parameterized types. If you are using aDatabase.QueryLocator, the returned list should be used.
Batches of records are not guaranteed to execute in the order they are received from the start method.
finish method
global void finish(Database.BatchableContext BC){}
The finish method is called after all batches are processed. Use this method to send confirmation emails or execute post-processing operations.

Batch Apex Governor Limits


Keep in mind the following governor limits for batch Apex:
  • Up to five queued or active batch jobs are allowed for Apex.
  • A user can have up to five query cursors open at a time. For example, if five cursors are open and a client application still logged in as the same user attempts to open a new one, the oldest of the five cursors is released.
  • Cursor limits for different Force.com features are tracked separately. For example, you can have five Apex query cursors, five batch cursors, and five Visualforce cursors open at the same time.
  • A maximum of 50 million records can be returned in the Database.QueryLocator object. If more than 50 million records are returned, the batch job is immediately terminated and marked as Failed.
  • The maximum value for the optional scope parameter is 2,000. If set to a higher value, Salesforce chunks the records returned by the QueryLocator into smaller batches of up to 2,000 records.
  • If no size is specified with the optional scope parameter, Salesforce chunks the records returned by the QueryLocator into batches of 200, and then passes each batch to the execute method. Apex governor limits are reset for each execution of execute.
  • The startexecute and finish methods can implement only one callout in each method.
  • Batch executions are limited to one callout per execution.
  • The maximum number of batch executions is 250,000 per 24 hours.
Only one batch Apex job's start method can run at a time in an organization. Batch jobs that haven’t started yet remain in the queue until they're started. Note that this limit doesn’t cause any batch job to fail and execute methods of batch Apex jobs still run in parallel if more than one job is running.   

Step 1: Write an apex class for Batch Apex.

Sample code:

global class AccountUpdate implements Database.batchable<sObject>
{

    String query,field,value;
   
    global AccountUpdate(String f, String v)
    {
        field = f;
        value = v;
        query = 'Select ' + field + ' FROM Account';
    }

    global Database.QueryLocator start(Database.BatchableContext BC)
    {
        return Database.getQueryLocator(query);
    }
   
    global void execute(Database.BatchableContext BC, List<sObject> scope)
    {
         for(sobject s : scope)
         {
             s.put(Field,Value);
         }
         update scope;
    }
   
    global void finish(Database.BatchableContext BC)
    {
    }
   
}

            The above class is used to update Description field with some value.

Step 2: Go to Setup à Developer Console.


Step 3: Execute the Batch Apex.

Id batchInstanceId= Database.executeBatch(new AccountUpdate('Description','Updated'));


 Step 4: Monitor the Apex jobs.
To monitor the Apex jobs, go to Setup --> Monitoring --> Apex Jobs.